
I am thankful to live in such an amazing place where the sagebrush grows. As I approach a full decade in the beehive state, it feels to be an Aggie.
I am thankful to live in such an amazing place where the sagebrush grows. As I approach a full decade in the beehive state, it feels to be an Aggie.
Today we are going to get started using Scratch in order to use this tool with elementary students. While there are plenty of great videos created by the MIT Scratch team at scratch.mit.edu, we are going to go over the basics of using Scratch to draw with the pen tool. Feel free to create an account at scratch.mit.edu or feel free to use mine (I will make the credentials available in the classroom). Before we jump into the activity, first I would like to provide a bit of context.
Scratch is a programing environment developed by the Lifelong Kindergarten research group at the MIT Media Lab. The research group’s leader and LEGO Papert Professor of Learning Research, Mitchel Resnick, reminds us to honor the vision for child-centered computing that Seymour Papert advocated for with Scratch’s predecessor LOGO. Mitch extracts four essential elements from Papert’s Mindstorms (1980): projects, passion, peers, and play. You should read Mitch’s piece on these here:
https://www.media.mit.edu/posts/the-seeds-that-seymour-sowed/
In summary, children should be: working on projects that they are passionate about, working together with peers of varying experience providing constructive feedback, and doing so with a playful approach to testing out ideas and overcoming challenges. The reason I share all this before getting into my lesson is to remind everyone that this is one way to start learning Scratch, but should be learner-centered once the student has the basics. My hope is that that once you make a square and another shape, you start thinking of how to make something that interests you.
After trying the Start here challenge for a few minutes, we are going to have you work with a partner on the LessonHandout sheet that was passed out in class. You will also need a turtle (green triangle with a hole for a pen). As a team try to make the turtle follow the script on the handout by moving it around on the stage. Next, you will translate the script into your own words.
I have been starting to mess around with programming for the Adafruit’s Circuit Playground Express. Here is my first program to use the multicolor LEDs (neopixels) on the board to display the current temperature. The temperature is rounded to the nearest ten. Each light represents 10 degrees (1 light => 5 degrees Fahrenheit).

Below is a link to launch the simulator. You can make it fit the screen by adjusting the width of your browser. Click the A button to activate the thermometer for five seconds. Adjust the temperature by clicking and dragging on the red thermometer in the top right. This is the link in case you want to edit the program: (https://makecode.com/_FVbiPfTY7D6T)
Today we will be modifying an existing program to run on your Gemma Arduino. You will want to use Firefox for visiting the programing site. Please visit my codebender.cc page to find the STEM-U code here:
https://codebender.cc/user/ryespy
You can find the templates for the STEM-U Lesson Plan on the Center for School of Tomorrow here:
http://csf.usu.edu/stem_u
RAFT Kit Standards
http://www.raftsac.org/ideas/Binding%20Comb%20Battery%20Holder.pdf
Next Generation Science Standards for engineering in grades 3-5
http://www.nextgenscience.org/3-5ets-engineering-design
House keeping:
Please take the Post Survey here:
https://www.surveymonkey.com/s/Post_STEM_U
Please take the strand post assessment:
https://usu.co1.qualtrics.com/jfe/form/SV_1IaF5hqN13b6etT
SparkFun’s Great Big Guide to Paper Circuits
https://learn.sparkfun.com/tutorials/the-great-big-guide-to-paper-circuits
Dr. AnnMarie Thomas and the Playful Learning Lab’s Squishy Circuits Page (St. Thomas University)
http://courseweb.stthomas.edu/apthomas/SquishyCircuits/
Utah Stem Action Center Classroom Grants up to $1500 Due October 2, 2015
http://stem.utah.gov/for-educators/grant-opportunities/
Adafruit Tutorials
https://learn.adafruit.com/
You have all the supplies to make this light sensitive heart.
https://learn.adafruit.com/light-activated-pixel-heart
E-textile Monster from Jessica
http://darcyneal.com/electronics/e-textiles/
Instructables
http://www.instructables.com/
Please feel free to share any suggestions in the comments below.
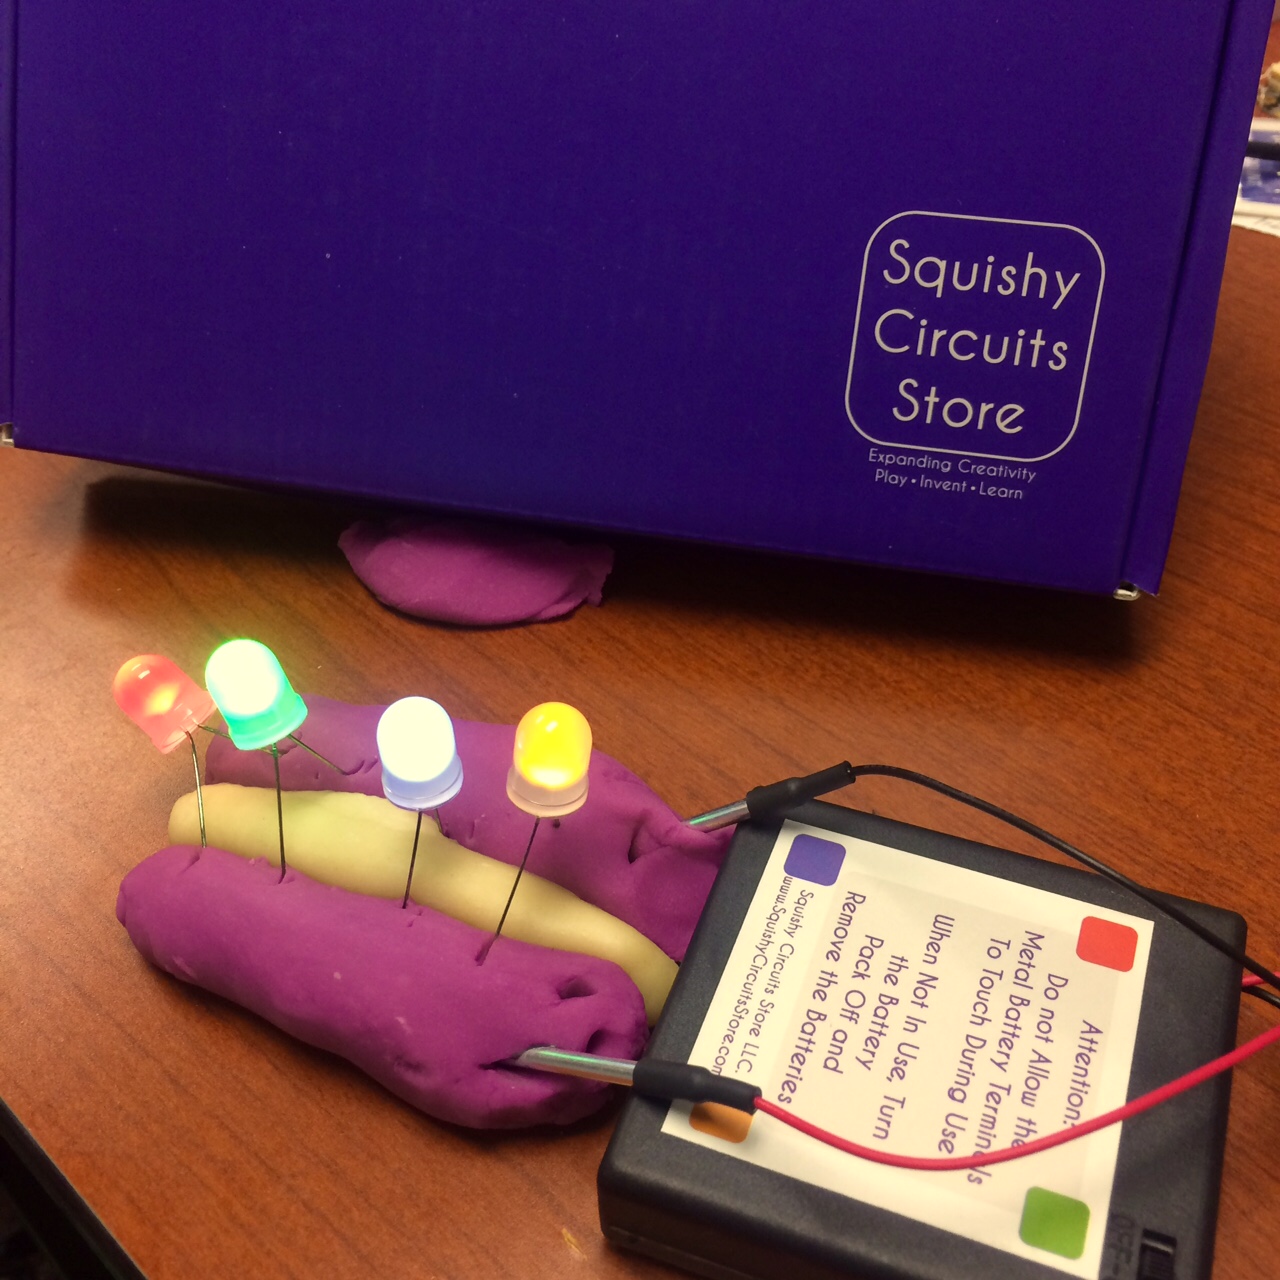
Yesterday we explored parallel and series circuits with copper tape, through-hole LEDs, CR2032 button batteries, and card stock. Today we will revisit these circuits using conductive and non conductive dough. Before hooking up your squishy circuit, watch the following video.
This page from the creators of our squish circuit kits provides videos showing how to make conductive and insulating doughs. They have additional information on safety precautions and how to apply Ohm’s law. Thank you Dr. AnnMarie Thomas and the Playful Learning Lab at St. Thomas University for developing and sharing these materials. http://courseweb.stthomas.edu/apthomas/SquishyCircuits/
Let’s see what happens when we try to make a series and parallel squishy circuit. How might you be able to integrate a squishy circuit into a lesson you already teach?
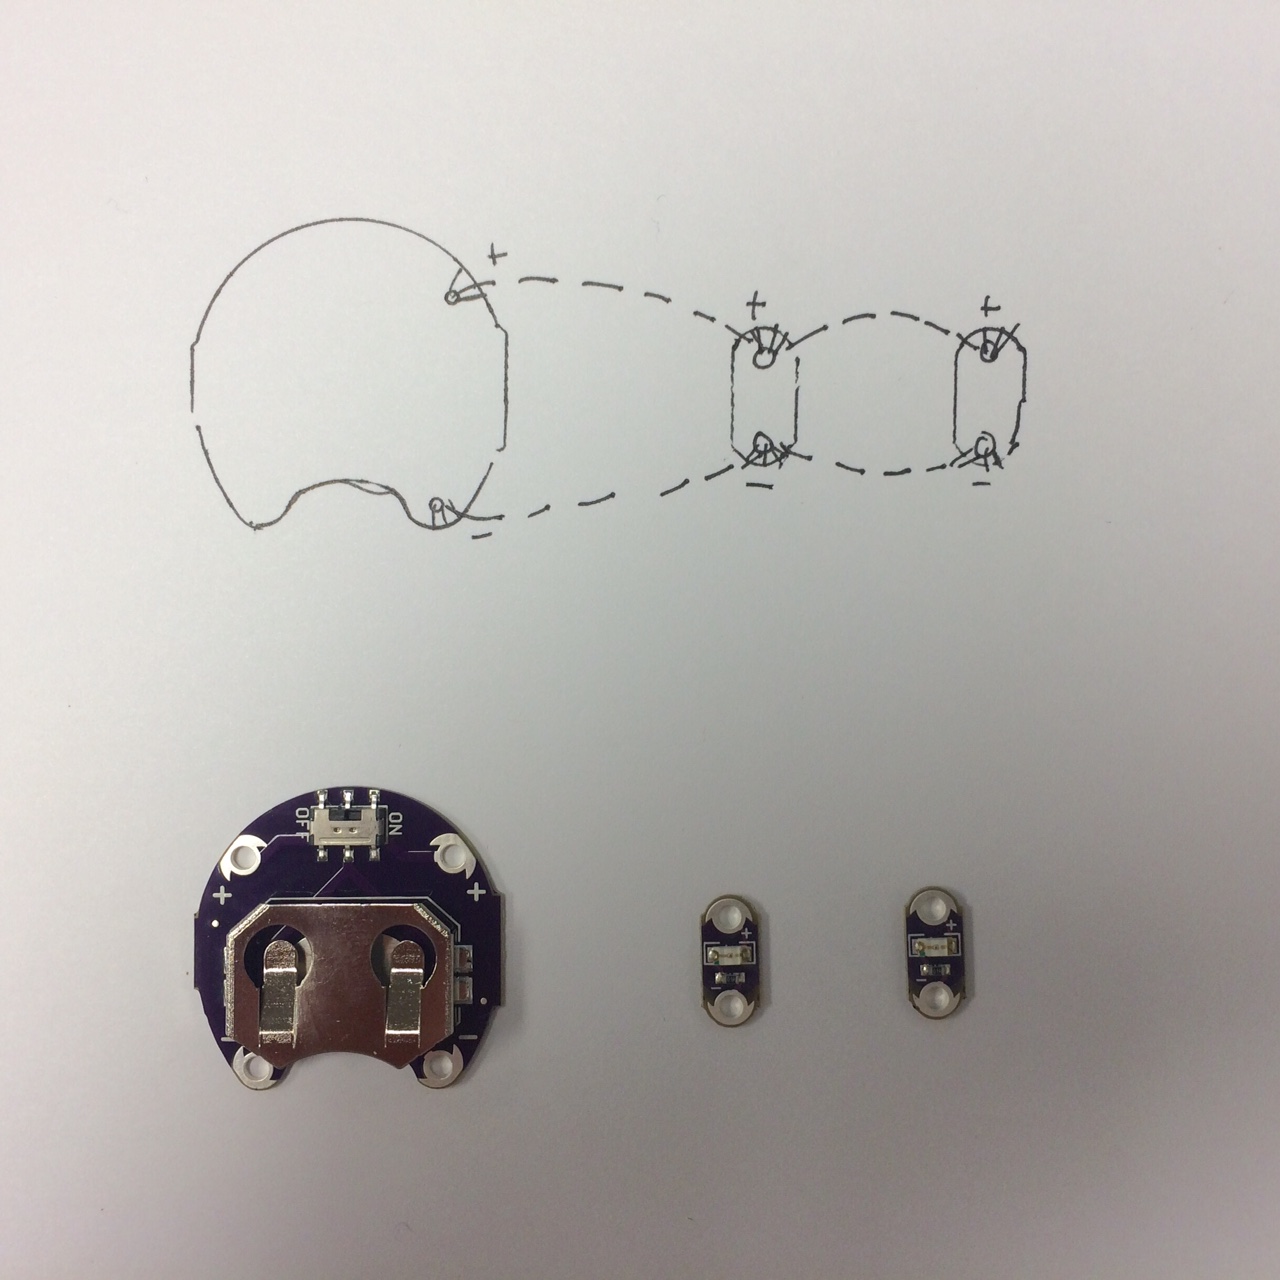
Next we will begin to create some e-textiles. You may say, “what is an e-textile?” An e-textile in our case will mean using conductive thread(stainless steel fibers) to sew LEDs, buzzers, and microchips into a piece of fabric. Lets start with a very simple circuit. We will wire two red Lilypad LEDs in parallel to a Lilypad battery holder with an on-off switch. First you should always sketch out your circuit. I like to trace the components to help me see how everything will line up.
Matt has created a video for tutorial on threading a needle. He can also show you in person.
When starting a stitch I put a double-knot at the end of my thread and fold the thread over the needle so it overlaps about 4-5 inches. It is best to keep your stitches short (1/8″) to maintain conductivity. In the circuit drawn above I will start my stitch on the back of the positive end of the LED on the right and stitch around the tab 4 times before stitching towards the next led. You will want to use one piece of thread to continuously stitch the entire positive line from led, to led, to battery, and then tie off. You will use a drop of clear nail-polish to secure the knot. Repeat this procedure for the negative(ground) line. Insert your battery and test your circuit. This first e-textile was mainly to practice stitching.
Now that you have a little practice with stitching with the conductive thread, let’s try and make a bracelet. Here is a nice tutorial on Instructables: http://www.instructables.com/id/LED-Cuff-Bracelet/?ALLSTEPS
https://rwporter.wordpress.com/
https://mfbruss.wordpress.com/
https://catpurser.wordpress.com/
https://mrsstratford.wordpress.com
https://awesomestemscience.wordpress.com
https://brink0121.wordpress.com
https://tamararigby.wordpress.com
https://alissablake.wordpress.com
www.sparkfun.com LED’s, Lilypad, copper tape
www.adafruit.com micro-controllers(Gemma Arduino), neopixels
www.digikey.com coin batteries 2032
http://chibitronics.com/ Sticker based paper circuits Chibatronics
Welcome to the STEM-U Sewing Up Science Workshop. This blog will provide a tentative outline of the activities you will be working on throughout the week. I have created this blog on WordPress. I would like you all to create a blog of your own to create a lasting artifact that you will be able to refer back to during the busy school year. My entries will also continue to be available for your reference.
Last spring I taught a full semester course called Craft Technologies in the Instructional Technologies and Learning Sciences department. I have been living in Logan for a year now. Before starting my doctoral studies, I was an elementary science teacher in Brooklyn for 8 years.
The tentative agenda for the week: STEM-U_Agenda
Please click here for our preassessment: https://usu.co1.qualtrics.com/SE/?SID=SV_1IaF5hqN13b6etT
Today we are going to be working with paper circuits and squishy circuits. In addition, we will be getting everyone up and running with WordPress on your new tablets. You will notice that these devices might be a little slow, but as teachers we all know how to make the best of the materials we are provided. I have created a blog entry with my NuVision tablet on how to make our first project of the day, which is a paper circuit enhanced name tag. I have found that it is best to have the camera over expose for the light for nicer looking images, below is an example.


These are screen shots to show how to access the exposure control. Touch the circle to the right of the blue dot. Then click the +/- icon (not pictured) and then click +3 or +2.
Head over to the Name Tag Post by clicking on this link: https://ryespy.com/2015/07/22/name-tag/
This work is supported by the Center for The School of the Future at Utah State University, http://csf.usu.edu/, and Idaho National Labs, https://inl.gov.

